Are you the next Dr. Disrespect? Are you the best Rocket League player you know? Is your incessant couch commentary so entertaining to your gaming friends that they’ve asked you to never, ever stop? Probably, then, you’ve thought about streaming on Twitch.
It can look a little complicated if you’re watching professional streamers go ham on League of Legends. But getting your face and live gameplay on Twitch is actually a very easy thing to do. PC games tend to be the most popular sort to stream on Twitch and often rely on different setups from games on consoles, so for now, we’ll focus on that. You can use a lot of the same instructions, plus a piece of hardware called a game capture card, to stream console games.
Here’s how to stream games on Twitch using your PC:
1. Assess your equipment
To stream, you’ll need a few things: A good PC, a video game, a headset with a microphone and, maybe, a webcam. Lots of streamers use a second monitor to read Twitch chat, too, but that’s not necessary. (You can use your phone.)
Let’s break that down.
Your computer should have at least an Intel Core i5-4670 or AMD Equivalent with at least 8 GB of memory. It should also run, at minimum, Windows 7 Home Premium. Obviously, your graphics card should be able to handle the game you’re trying to play and your internet should be stable (a LAN connection is ideal).
It’s good to have a headset with a microphone—your typical gaming headset—so, if you’re talking into a microphone with a game’s sound on speaker, there isn’t any feedback.
2. Make and customize a Twitch account
Use your gaming tag, Twitter username, or whatever and create a Twitch account. If you want to personalize it, pick a cute avatar. Lots of streamers share a little information about their favorite games or PC specs on their channel pages, too, which they can add in from their channel pages’ “Edit Panels” section.
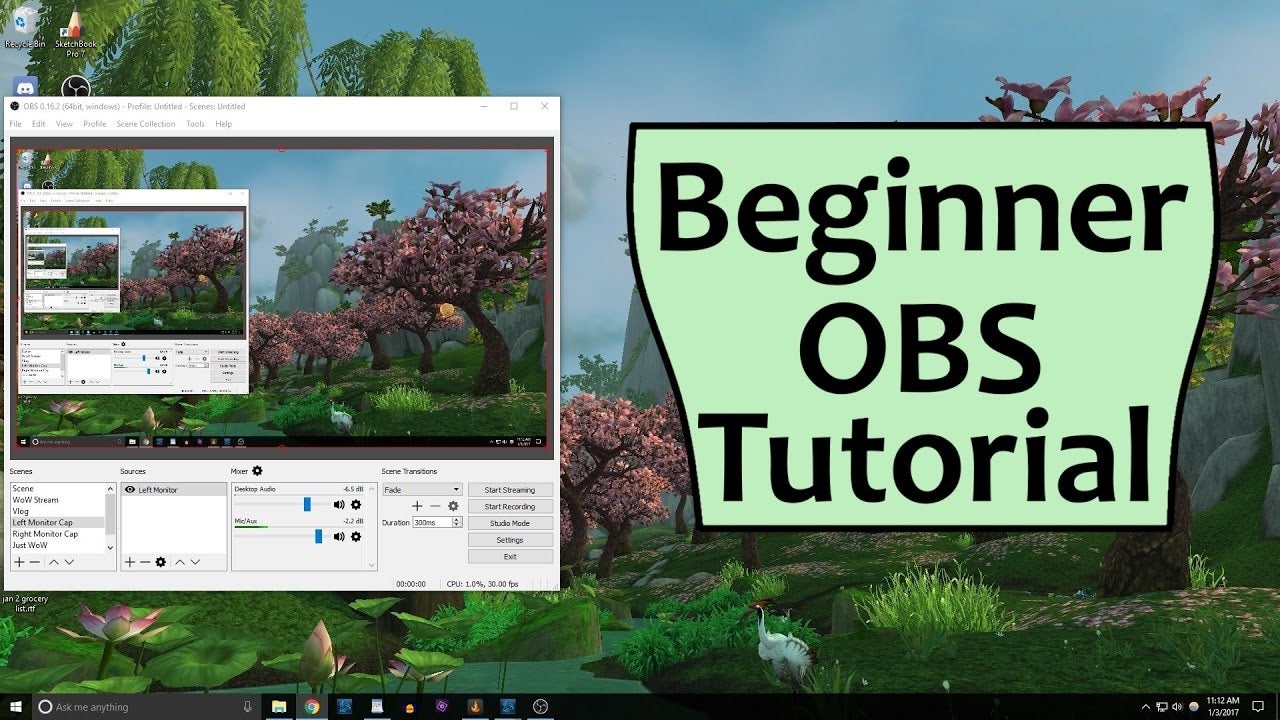
3. Download broadcasting software
Open Broadcaster Software (OBS) is free and easy to use. There are lots of other options, like XSplit, which is not free but is easier to use, and Gameshow. Since you’re just starting out, let’s assume you’re using OBS
4. Set your broadcasting software settings
After downloading the software, go into your settings. Make sure your default language is correct. In the “Stream” tab, select “Twitch” as your source. Then, you’ll be prompted to input your Stream key. Open up the Twitch website and, there, you can find your Stream key on your Dashboard. It’ll let you broadcast straight from your broadcasting application to Twitch with the push of a button.
Run through your software settings to make sure your video bitrate isn’t too high (here are Twitch’s guidelines). Also, make sure that your camera and microphone are selected.
Finally, let’s talk about scenes and sources. Sources are sources for the stuff you see and hear on the stream—video games, camera, images, etc. Scenes are different collections of sources that streamers can shift between. So, for example, say that I need to make myself a sandwich and take a break from streaming Overwatch. I might have a logo and the text “I’ll Be Right Back” playing on screen along with a song. Those are all sources, and to get all of them to my viewers at the same time, I’ll click on the scene, “Be Right Back.”
For streaming PC games to Twitch, set a scene with a name like “Game Stream.” OBS knows when you’re starting a PC game. So make “Game Capture” one of your sources (“Window Capture” is trickier, so steer clear from that at first). When you start a game, OBS will make it a source. Add your microphone as a source and if you’d like to use a camera, add “Video Capture Device” as a source, too. You can adjust where sources appear on screen by clicking on them. And you can adjust your audio input volumes and desktop volumes as you see fit.
5. Preparing the non-game stuff
If you’re going to be on camera, wash your hair! Drink some water! Put on a cute outfit, too, if that’s your thing. Warm up on your game of choice first unless you’re not afraid of embarrassing yourself. Think about a few things to say to introduce yourself. Maybe practice them, too.
Plan out your stream. Will you be marathoning a game? If so, prep some meals. Are you on a tight schedule? Then calculate how long your gaming session should take. If it’s an online game, consider muting teammates’ voice chat so your viewers can hear you or consider muting yourself in-game so you can talk to your viewers without bothering teammates.
On Twitch, change your Stream title to reflect what you’ll be playing.
6. Record a test stream
Even though you’re an amateur, you don’t want your stream to look and sound like it. On OBS, try recording a fake, 30-second stream. Then, listen to it. Is your mic audio too loud? Is the game audio too quiet? Are you well-lit? Do the game’s graphics look good? Scrutinize the recording and make relevant adjustments.
7. Promote your stream
Let your friends on Facebook and Twitter know that you’re going live and drop a link to your Twitch channel. Make sure to mention an exact time and stick to it. People easily lose interest in things online, so if you don’t show up at the specified time, they might find greener internet pastures. Do not over-promote. You do not want to be that guy.
Know your strengths. If it’s gameplay, mention your rank in the game or some other spectacular stat. If it’s commentary, come up with a cute title for your stream. If you’re playing a strange game, sell it. Think about what makes your stream special and broadcast it. Viewers will prefer knowing what they’re in for when they click on your channel. (FYI—there are some games that are banned from streaming on Twitch, many because they’re NSFW. Here’stheir ban list.)
Finally, have realistic expectations. First-time streamers are lucky if they get even a dozen viewers.
8. Go Live
Load up your game. Navigate to your Twitch channel in your web browser. Take a shot of whiskey. And when you’ve got yourself together, hit “Start Streaming.” If you’re into it, you can load up a “The Stream Will Begin Shortly” scene before simply going live with a game, which is good to keep up for about five minutes. (Make sure to mute your microphone if you’re doing that.) Then, when you’re ready, switch your scene to the “Game Stream.” Make sure you’re not muted. And then, smile for the crowd.
[Update—9:45 a.m.]: This post has been updated with new information about NSFW restrictions and streaming from consoles.